
If you wanna look eye-catching, you need to make this clutch. It will be good for any party. Choose bright clothes and all eyes will be on you!

I’ve created a tutorial for the perfect rose gold sequin box clutch you will definitely love. I honestly love this bag. It really help to dress up an outfit. I’ve taken it out with me twice, and have got so many compliments. It’s even more fun to surprise people by telling them I made it. I also love that there is plenty of room for all of my essentials….


(Of course, if sequins aren’t your thing you can use this tutorial to make this DIY Box Clutch using any other fabric……!!)
If you also have some jewelry boxes lying around….. Then this is a great way to use them and turn them into a must have accessory for every girl….!!
Supplies:
- Rose gold sequin fabric
- Lining fabric
- Fabric glue / super glue
- Old jewelry box
- Paper clips
- Chain
- Scissors
- Hot glue gun and hot melt glue sticks
- Saw or sharp knife

The Fabric
I chose this rose gold sequin fabric that I had sitting in my fabric box for over six months. I’ve never really had any use for it until now! Sequin fabric can run on the expensive side, so I would recommend checking out the scraps/remnants box at your local fabric store or even your local tailor shop. This is where fabric goes when there is only a small amount left, and so not enough to stay on the roll. I picked up over a meter of this fabric from a remnants box from my local tailor. So shop around and I’m sure you’ll find something that isn’t too pricey.
Let’s get started:

I have an old (PC Jeweller’s) Jewelry box and I wanted to have a stunning sequin box clutch. So, I decided to make one myself…… 🙂 🙂

Take out the covering carefully without damaging it….

Take out the snap closure buttons out.


Now take the lining fabric, measure it by placing on the covering and cut (make sure to cut an inch extra from each side to stick on the inside….)

Stick it on to the covering with the fabric glue…..

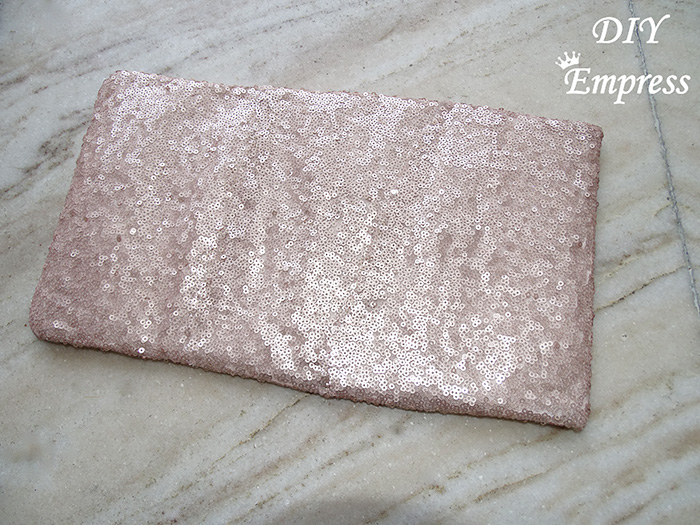
Repeat it with the sequin fabric…..
(Look: outside!)
(Look: inside!)

Now add the snap closure button on place by making cut in fabric by scissors… (Make the cut in fabric just in place of the previous cuts in the covering from where you have taken it out)

To add the chain you have to add the paper clips on the inside of the top panel…. And secure them with hot glue… They should be at least 2 mm out from the edge….
(In this picture I placed the paper clips at the top of the back panel but later on I decided to shift them on the inside of the top panel… Because that is the best place for the chain to be added…!)

Since my jewelry box opens from the front panel and I wanted it to open from the top panel so, I decided to cut off the top panel with a saw….


Now you are almost ready to add every thing to place….

You have to add all the cushioning material to place…. The cushioning flap of the front panel will work as the front wall now… Secure every thing with hot melt glue….

You have to cover the sides with the lining fabric with the help of fabric glue…. (you may do this step before the previous step to prevent the lining to be shown….
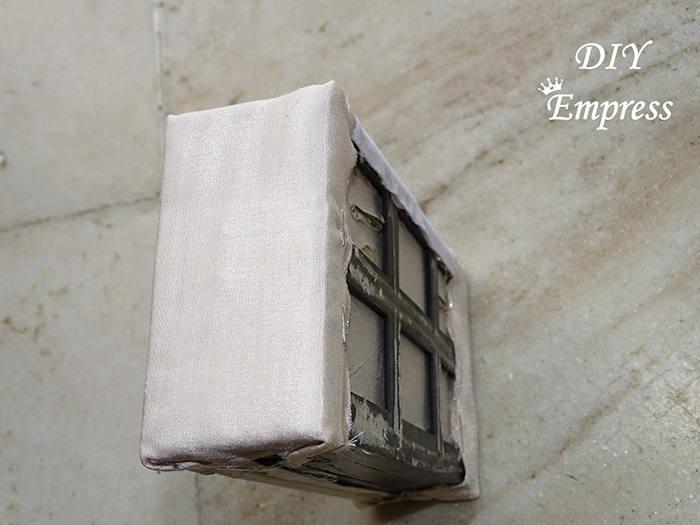
(you will understand what I am trying to say when you see this picture…. Yes… I was talking about that fabric peeping out…!!)
In the next step you have to stick the covering in place as it was… with the super glue….

Then add the chain to the paper clips you secured….

You may add a cute bow made of the lining fabric to the flap….. (I did it because I love bows…!!!)

You’re Done….!!
You are ready to flaunt this lovely and girly box clutch…. 🙂 🙂


Hope you like it……….!! 

Very nice
LikeLiked by 1 person
Thank you 😊
LikeLike
You are a very creative person 😍
LikeLiked by 1 person
Thank you 😊😊😊😍😍
LikeLiked by 1 person
This is so adorable! ❤ 😉 I came from the blog party! 😉
https://busybeeblogweb.wordpress.com
LikeLiked by 1 person
😊
LikeLiked by 1 person
Wow, it’s beautiful!
LikeLiked by 1 person
Thank you 😊
LikeLiked by 1 person
I love the way you did the diy and repurposed nice job
LikeLiked by 1 person
Thank you 😍😊
LikeLike
Such a good idea, looks really nice!
LikeLiked by 1 person
Thanks 😊 I am glad you liked it ❤
LikeLiked by 1 person
This is amazing! I can’t believe what you started with and what the final product looks like. This is a DIY win for sure 🙂
LikeLiked by 1 person
Thank you 😊 I am glad you liked it 😊💖❤
LikeLiked by 1 person