Denim jeans have a lot of character and style, even if they’re worn out or outgrown.
Jeans are popular, and for good reason: they are comfy, fashionable, and go with just about everything. They don’t last forever, however. Instead of throwing away your jeans when they get worn out, however, why not turn them into a trendy new bag?

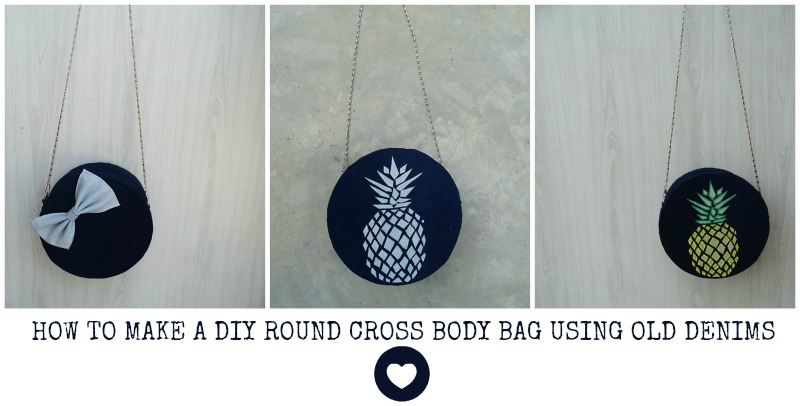
I wanted to do this project for a long time ago, but never be brave enough to do it. I’m afraid to cut my jeans, even though I know these jeans will never be worn again. But I will never know the result if I never try it. So, I finally did it. Let me show you what I did with these old jeans and make a DIY round cross body bag using old denims…! Hooray….!
But First Subscribe to my YouTube Channel Majestically Mighty
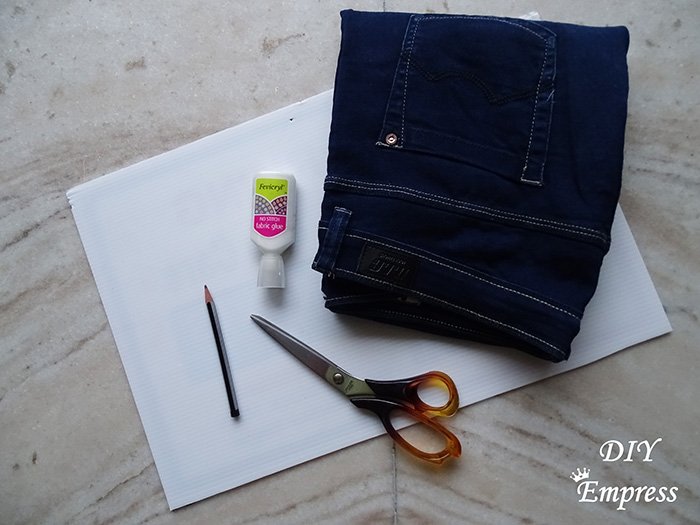
Materials required:
- Old denims
- Plastic fiber sheet (I used a no parking sign board)
- Zipper
- Fabric glue / super glue
- Scissors
- Chain
- Fabric chalk
- Compass and pencil
- Fabric paints
- Paint brushes
- Old calendar
- Big jump rings or something like that
- Paper
- Fevicol marine / mod podge
- Spatula
- Pliers
Let’s get started:
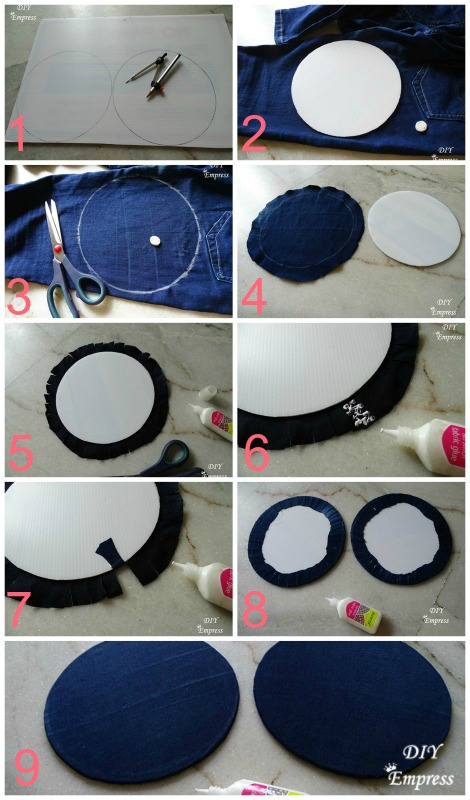
- So first you need to draw two circles according to the size of the bag you want to make.
- Cut them out and place them on the denim fabric.
- Mark the outline of the circle using fabric chalk.
- You have to cut at least one inch outwards from the marked circle in order to provide some extra fabric to cover the fiber sheet nicely.
- Place the fabric piece upside down and apply the fabric glue on one side of the fiber sheet then stick it to the middle of the fabric.
- Cut the extra fabric in fringes of medium thickness to avoid any wrinkles in covering the fiber sheet.
- Apply fabric glue on each fringe and paste it on the fiber sheet.
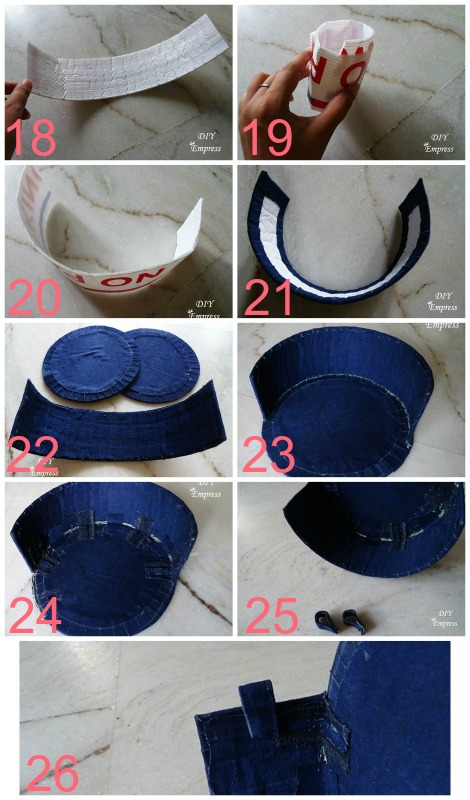
- Repeat these steps to make two disks covered with denim…….
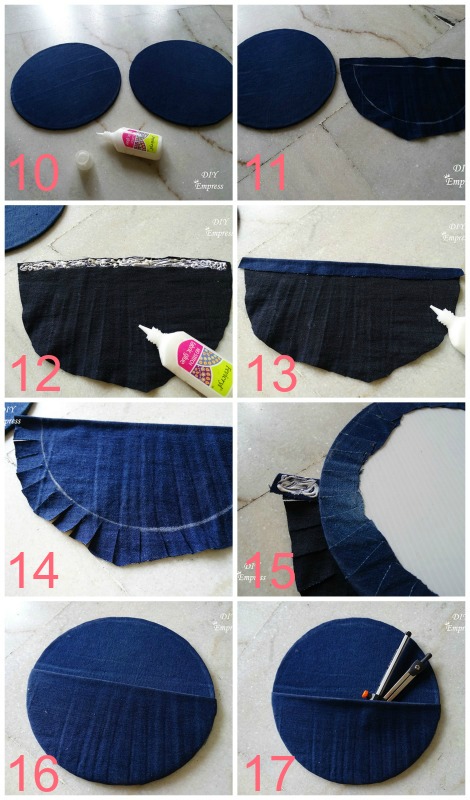
- Now for the little pocket at the back, you need to cut a semi circle according to the size of the original circle and remember to cut one inch extra on every side.
- Place the semi circle upside down and apply fabric glue on the top (straight side) and fold it onto itself to prevent any stray edges.
- Place the semi circle on the working station facing downwards and then place one of the full circle disk on it (facing downwards).
- Cut medium width fringes and paste them on the disk with fabric glue.
- This will create a pocket 🙂
- Now you have to decide the width of the bag, and what length you want it to be….. (i.e. circumference of circle – zipper length = length of the fiber sheet you have to cut) according to that cut out a piece of fiber sheet.
- (I hope that I have described it well…. but still…. take help of the pictures….. 😀 😀 )
- Now you have to roll it length wise and tie until it comes in a curved shape and does not unfold by itself…..
- Cover it with the denim in the same manner as above…..
- Then cover the inside of each piece by denim fabric…. (optional)
- Now you have two circular disks and one curved rectangular piece all covered in denim…….
- Now you have to apply glue on the edge of the longer side of the curved piece and stick it to the edge of the back panel keeping in mind the position of the pocket (and the pocket will be on the outer side)
- Take some fabric pieces, apply glue and paste them as shown in the picture for extra strength.
- Take the denim pieces in which the belt is inserted and make two loops, paste them on the smaller edge of the curved piece to attach the shoulder strap / chain.
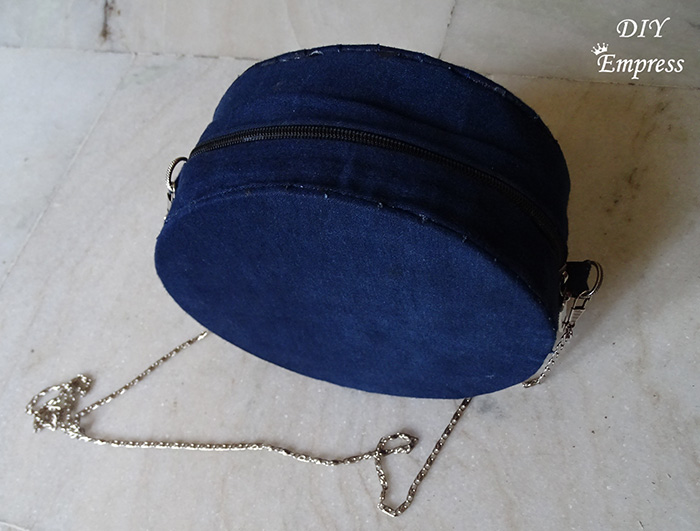
- Then stick the front full circle disk to complete the basic structure.
- Now take the zipper two inches extra from the prefered length.
- Place the zipper facing upwards, and place a rectangular denim fabric facing downwards (edge to edge)
- Apply glue to stick the fabric to the zipper…..
- Now apply glue on the same edge but on the opposite side….. then fold the fabric onto itself….. this will bring out the fronts of both the zipper and the fabric…… (refer the image 😀 )
- Repeat this on the other side of the zipper with second piece of fabric……
- Now place it upside down…… and cut two strips from old calendar to give ti some firmness…… and stick them on the denim fabric, each on one side of the zipper…. (keeping in mind that the total width of this must be the width of the curved rectangular piece plus one inch extra fabric on each side)…..
- Again cut the fringes of medium width and start sticking it with the fabric glue…. but this time you have to apply the glue on the front side of the fringes and stick ti on the inside of the circular disks………
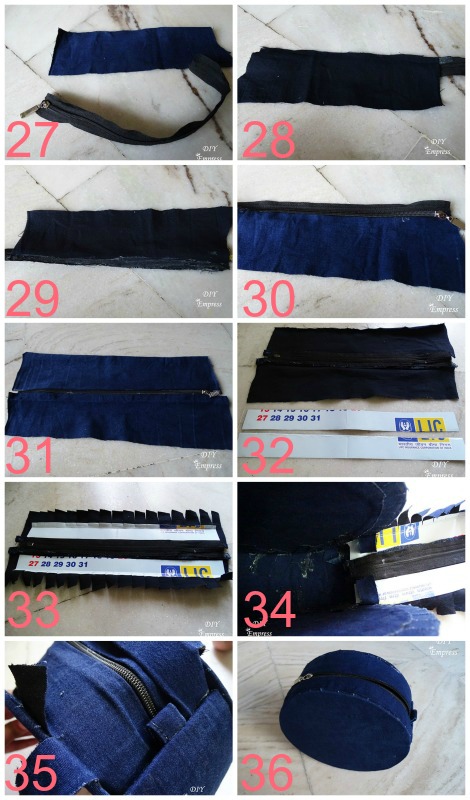
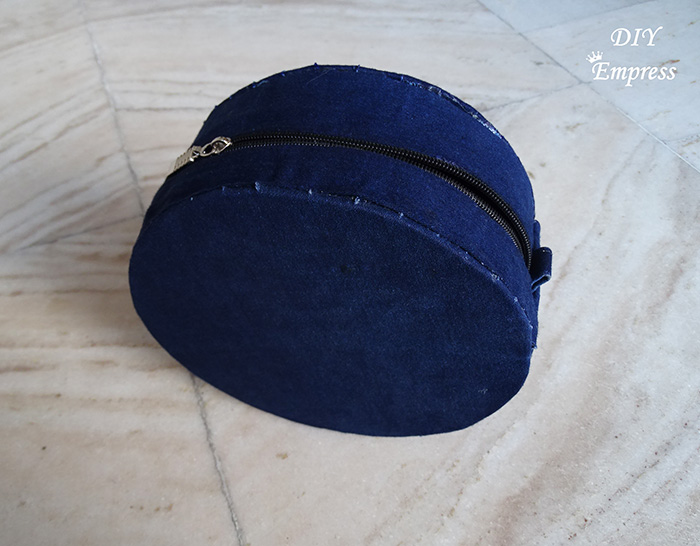
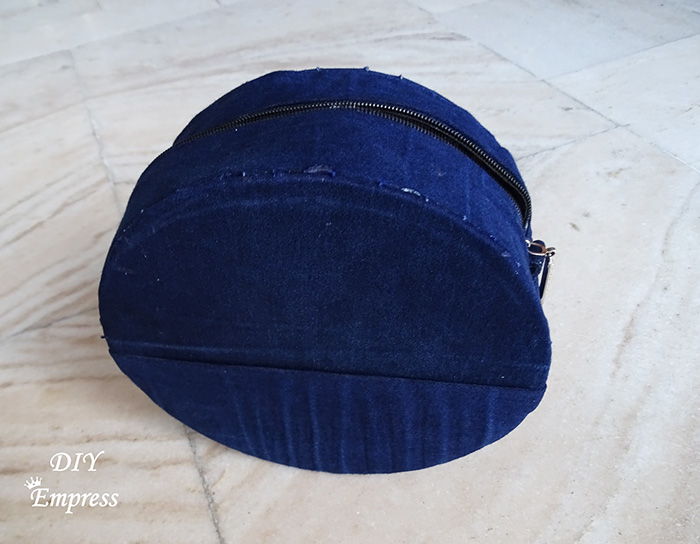
- It will appear like this when you will finish sticking every thing in place 🙂 🙂
Front:
Back:
- Now you have to attach the chain…..
- For that you have to attach big jump rings on the loops you created earlier…… (instead of the jump rings I have used two links of my old chain bracelet as they are strong and more reliable) 😛 😛
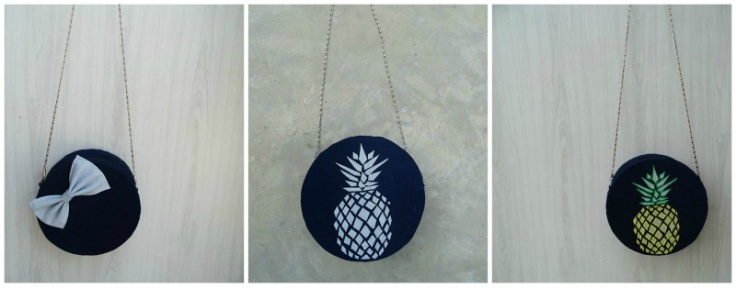
- You may use this as it is, but if you want to jazz it up a little bit, you have the following options……
Option 1:
- Take a different color of denim fabric (or any fabric of your choice)
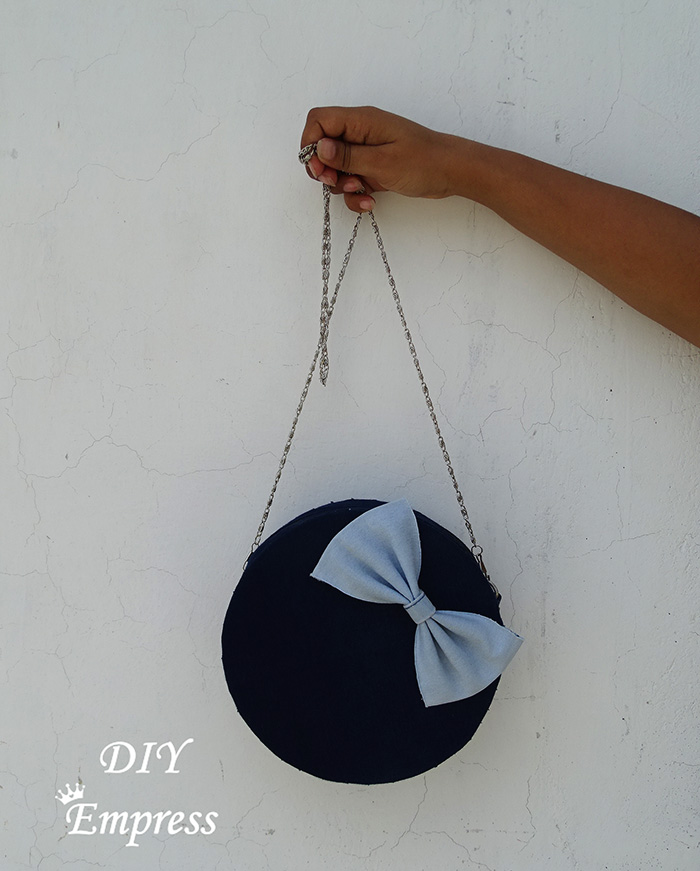
- Turn it into a bow…… and paste it on the front…… 🙂 🙂
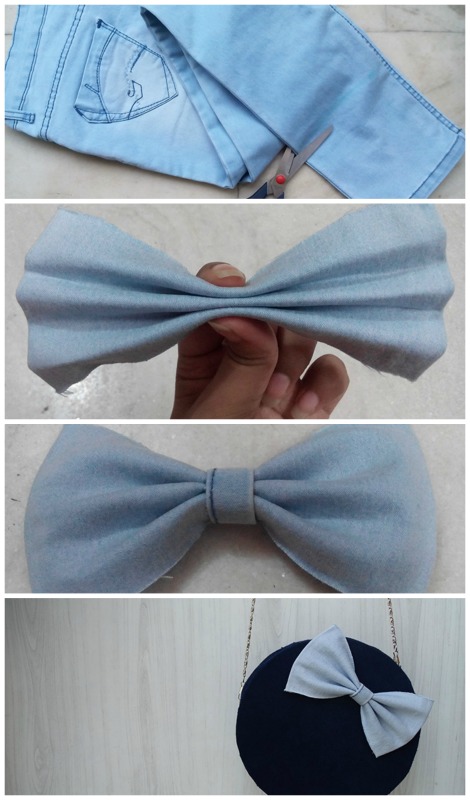
simple and cute…….. Ready to be rocked by you…… 😀
Option 2:
- Take a different color of denim fabric (or any fabric of your choice)
- Apply fevicol marine or mod podge on the back side of the fabric….. let it dry completely….. this will prevent the threads coming out from the fabric after cutting in small pieces…….
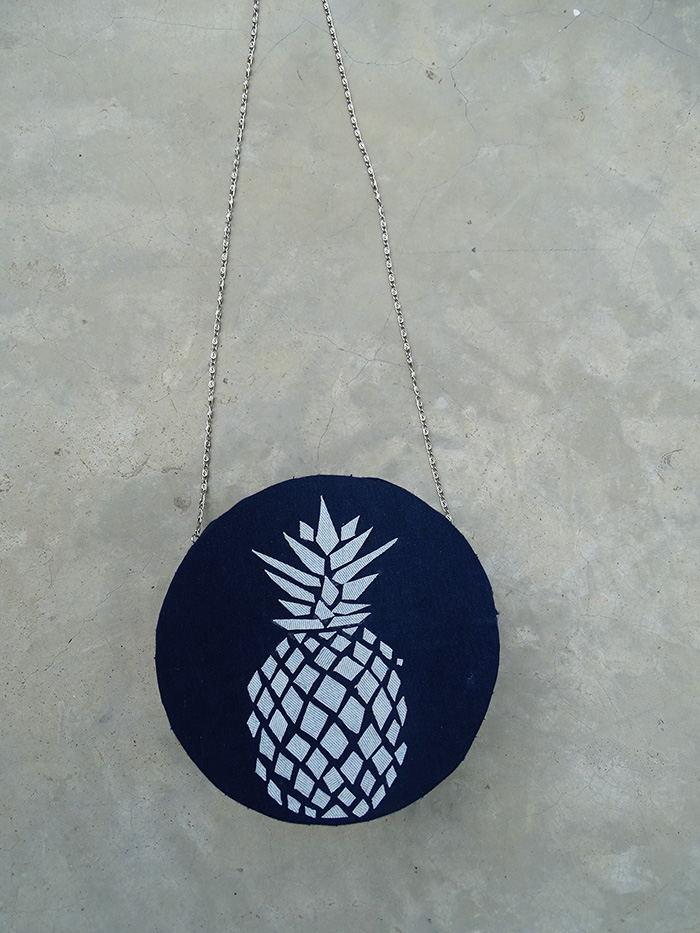
- When the piece is completely dried, draw a pine apple on a paper according to the size of the bag, create a carbon paper by rubbing the graphite part of the pencil on the back of the drawing……
- Place the drawing on the fabric both facing upwards…… secure it with tape, then trace the drawing on the fabric as you do with a carbon paper……
- Remove the tape and paper…..
- Then cut out the pieces and stick it on the bag…..
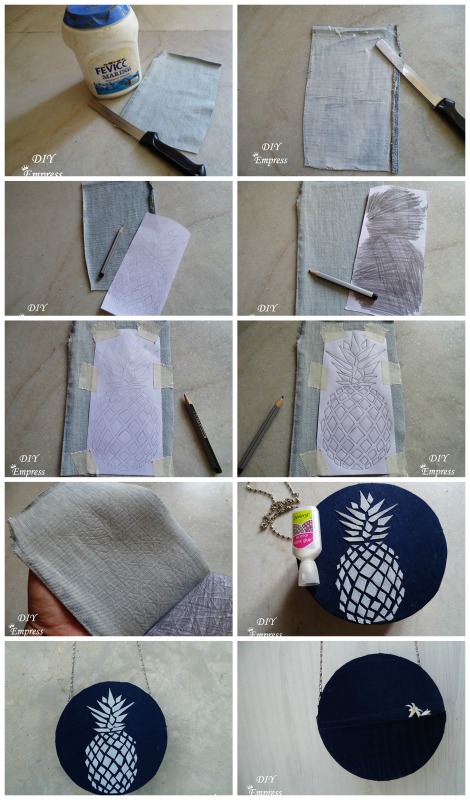
Here you have a cool pineapple bag 😛
Option 3:
- It is basically the continuation of option 2
- You may paint the edges of each piece…….

Now you are a proud owner of an amazing bag for the perfect “summer ready” look…… 🙂 🙂
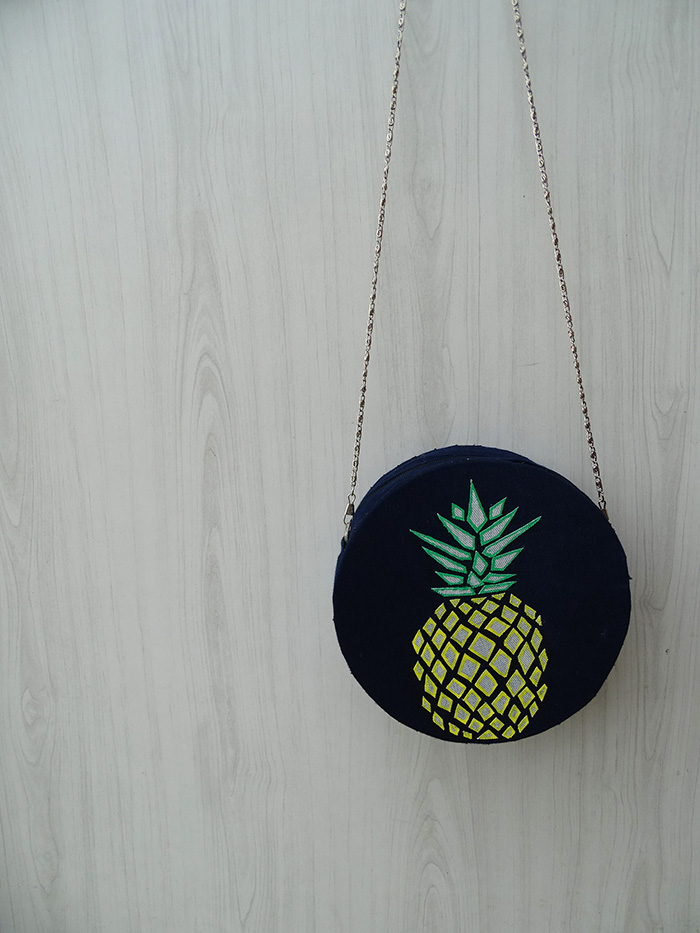
TADA………
I think this is my favorite project so far. How is my DIY round cross body bag using old denims turned out?
Which one is your favorite……. Do let me know in the comments below….
You may watch the video tutorial here
Hope you like it……..!!!!! 
Find me on Social Media


I love it so much!! I especially love anything with pineapples on it…hehe! Love this DIY! 😊❤️
LikeLiked by 1 person
Thanks a lot Tabi 💟 😊
LikeLiked by 1 person
My word🙉 this is so creative. I am fascinated 🤗! I will definitely try this out although I predict I’ll make a mess 🙉
LikeLiked by 1 person
😁😁💟 thanks 😊 n yeah do try it, I am sure that you will do good….. 😊
LikeLike
Very clever ! Great instructions!
LikeLiked by 1 person
Thank you so much 😊 I am glad you liked it 💟 😀
LikeLike
Wow, love this! Such a great idea and it looks cute! Great job girl 🙂
LikeLiked by 1 person
Thank you so much 😊💟💛
LikeLiked by 1 person
You are so creative. ! Good job 😄
LikeLiked by 1 person
Thank you so much 😊💟
LikeLike
How amazing! This is so clever!
LikeLiked by 1 person
Thank you so much 😊💟 I am glad you liked it 💟
LikeLiked by 1 person
Very impressive share !! Great job babe👍
LikeLiked by 1 person
Thank you so much girl 😁 I can’t wait for you to join me on this blog journey….. I really hope you enjoy your stay…. 😊😉❤
LikeLike
OMG 0_0
This look so awesome – no joke! Such creativity you have! I myself is a DIY enthusiant! 😀
Great job, amazing how it turned out! ❤
LikeLiked by 1 person
Thank you so much 😊💟 I am glad you liked it 💟
LikeLiked by 1 person
Omg! I wish I was that crafty haha! Amazing!
LikeLiked by 1 person
Thanks a lot 🙂 I can’t wait for you to join me on this blog journey!! I really hope you enjoy your stay,,,,, 🙂 🙂
LikeLike
This is so cool❤️❤️❤️
I love DIYs and I just fell in love with your blog.
LikeLiked by 1 person
Thank you so much girl 😁
I can’t wait for you to join me on this blog journey….. I hope you enjoy your stay…… 💞😊
LikeLiked by 1 person
Wow, this is so creative. I really like this idea 🙂
LikeLiked by 1 person
Thank you so much 😊 I am glad you liked it 💟😁
LikeLike
This is SUCH a great project! Love your blog 🤙
LikeLiked by 1 person
Thank you so much…… I a glad you liked it…..
🙂 🙂
LikeLiked by 1 person
Love these! So cute and so stylish, think the pineapple design has to be my favourite!
LikeLiked by 1 person
Thank you so much 😊 and yeah the pineapple one is my favorite too 😁👍
LikeLiked by 1 person